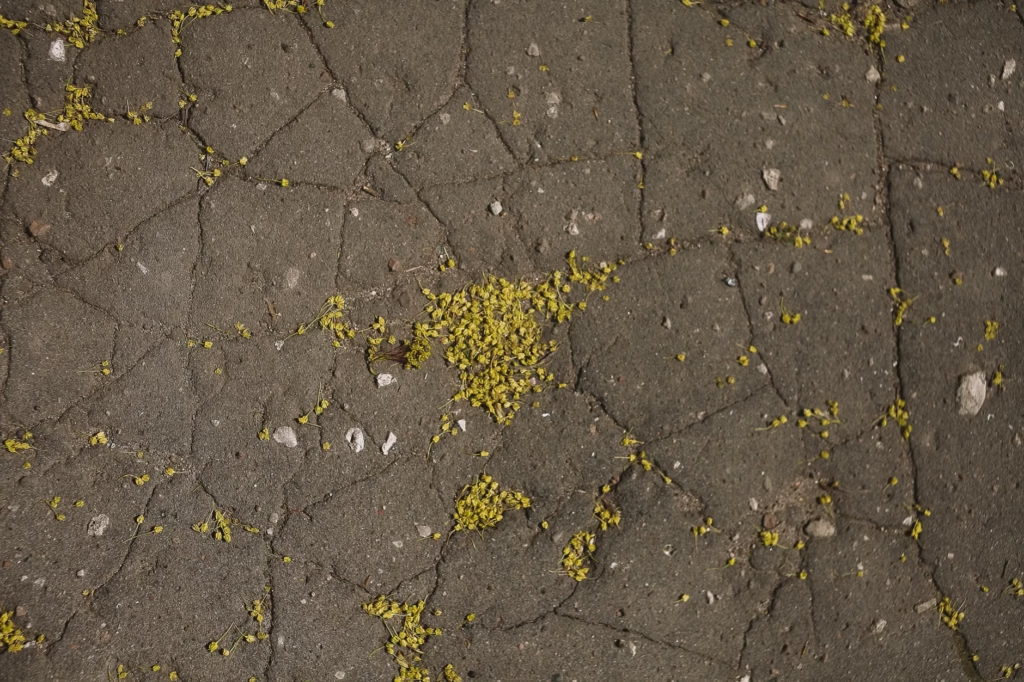
You walk out in October and the driveway looks different than it did in July. One corner is up. The control joint that used to be tight has a lip you can catch with your toe. The crack that was hairline now has a shadow you can see from the street. A lot of folks blame the concrete first, but what we keep finding is water where it does not belong. A drip line that’s been “fine for years” until a fitting starts weeping. A sprinkler that’s aimed a little low and keeps soaking one edge. Tree roots chasing that moisture, lifting and drying the soil in cycles.
In Albuquerque, NM we get hot stretches, then a hard swing to cold nights. That swing makes moisture driven soil movement show up fast. If the fix is only a patch on top, it comes back. Concrete driveway repair that lasts starts with the dirt, the water, and the edges.
How roots and irrigation change the soil under your slab
Concrete does not heave on its own. The slab follows the base. When moisture gets introduced on one side of a driveway, the soil under that side swells, then dries and shrinks. That cycling is what cracks slabs and makes panels ride up at joints.
Tree roots add a second problem. They do not just push up like a jack. They grow toward consistent moisture, which is usually a drip line, a bubbler, or a valve box that seeps. As the root mass expands, it displaces base material and creates hard spots. Then the soil around it washes out during heavy watering or a monsoon burst. Now you have a high spot next to a soft spot, and concrete does not like that.
A common failure we see is a crack that starts at a corner and angles across the panel at about 45 degrees. That is a panel trying to move but being held on one edge by root pressure or wet soil. If you can slide a credit card under one side of a crack and not the other, you have vertical displacement, not just shrinkage.
Spotting irrigation issues before they turn into a broken driveway
The giveaway is not always a puddle. With drip systems, the water can be slow enough that it never surfaces. It just keeps one strip of subgrade damp.
Here are signs we look for during a driveway walk through:
- A darker band of concrete along one edge that stays dark into the next day.
- Efflorescence (white, chalky mineral deposits) near a crack or along the slab edge.
- Soft soil at the driveway perimeter that you can dent with your boot.
- Settled gravel around a valve box, cleanout, or hose bib.
- A sprinkler that hits the slab for 10 minutes at a time, especially in the early morning.
A simple homeowner check is to shut off irrigation for 72 hours in mild weather and see if the soil along the edge firms up. Another is to watch a cycle and look for mist blowing onto the slab. Mist is still water, and it adds up.
For concrete driveway repair evergreen work, we want the water problem solved first. Otherwise you are asking a new patch, overlay, or replacement panel to live on the same moving base.
Why heave often shows up along edges, not the middle
Driveway edges are the weak spot because they dry and wet faster than the center. They also get less confinement. If the slab was poured tight to soil with no edge isolation, it can grab the dirt. When that dirt swells, it drags the slab up.
We see this a lot where a driveway runs next to a planter strip or turf. The watering is right against the concrete, and the soil stays wetter than the soil under the middle. Then the nights cool off in fall, the top layer dries, and the movement starts showing as curled edges and lifted corners.
Edge problems also show up where a driveway meets a stucco wall, a masonry stem wall, or a garage slab. If there is no isolation joint, the driveway and the structure fight each other. One moves, the other resists, and the crack chooses a path.
On repair work, we pay attention to that interface. A proper isolation joint is not a random bead of caulk. We use compressible joint filler (closed cell foam or asphalt impregnated fiber) and a sealant that stays flexible. That way the slab can move without tearing itself apart.
What we do to prep subgrade so repairs do not come back
If the base is wrong, the best concrete finish in the world will still crack. For driveway replacement or a section repair, we start by digging to sound material, not just to the bottom of the old slab.
Our crews are looking for three things: organic soil, loose fill, and moisture. If we hit roots, we remove what we can without destabilizing nearby trees, then we rework the base so the slab is not bridging over voids.
Typical steps on a lasting repair:
- Over excavate soft spots until the soil is firm under a jumping tamp test.
- Install compactable base, usually 3/4 inch minus crushed aggregate.
- Compact in lifts, not in one thick dump. A 2 to 4 inch lift compacts better than 8 inches dumped and pounded.
- Proof roll the area so we can see pumping or deflection.
If the area is staying wet from irrigation, we do not trap that moisture under new concrete. We will grade the subbase to shed water, and we will recommend moving emitters back from the slab edge. Concrete driveway companies that skip this part end up doing the same crack twice.
Edge isolation, root barriers, and joint sealing that actually work
There is a difference between controlling cracks and pretending they will not happen. Concrete shrinks as it cures, and it wants to crack. We decide where it cracks, and we keep water out of the crack.
For root and irrigation driven movement, details matter:
Isolation where concrete meets anything rigid
At a garage slab, a sidewalk, a masonry wall, or a porch, we isolate. A 1/2 inch compressible filler is common. Then we seal the top with a polyurethane or polyurea joint sealant once the concrete is cured and dry. If the joint is left open, sprinkler water runs straight down beside the slab.
Root barriers used the right way
Root barrier is not magic plastic tossed in a trench. It needs depth and placement. A 24 inch deep barrier placed between the tree and the driveway can help, but only if you also stop feeding roots with a drip line right at the slab. We also avoid wrapping roots tight to the slab edge, because that can create a perched water zone.
Saw cuts and sealed joints
We saw cut control joints early, usually the same day, to about 1/4 of slab thickness. Then we come back and seal joints where water is an issue. Sealed joints are a big part of concrete driveway repair evergreen performance.
Drainage details that keep landscaping water off the slab
A driveway does not need to be a channel for irrigation runoff. The goal is to keep water from sitting at the edge and from running under the slab.
We start with slope. A driveway should move water. We aim drainage away from structures, and we watch how water behaves at the garage door, at side yards, and at the apron where it meets the street. If the driveway is flat in the wrong spot, you can water the lawn and still end up with moisture under one panel.
For landscape edges, we like a clear separation. That can be a strip drain, a curb, or a grade break that sends water back into the yard instead of against the concrete. In some layouts, a small concrete mow strip helps because it gives you a hard edge to keep soil and mulch from building up against the slab.
One specific we see often is mulch piled right up on the driveway. Mulch holds water. It keeps the edge damp through the night. Pulling that back 2 to 3 inches and keeping soil grade below the concrete edge makes a difference.
If there is a chronic wet area, we will look at a surface drain tied into a legal discharge point. We do not just bury a pipe and hope.
Fall timing: what to fix now, and what to watch through winter
October is a good time to get eyes on this stuff because irrigation schedules change and temperatures drop at night. That is when small voids and lifted edges start showing.
If you have active heave, we want to find the water source now. A leaking valve manifold can run all winter if it is on an automatic schedule. A drip line can keep soaking the base even when the lawn looks dormant. Shutoff and a pressure test on the irrigation line can tell you a lot.
For concrete work, cold nights change curing. Once nighttime lows start flirting with 40°F, we plan pours and repairs tighter. We use the right mix, protect the surface, and do not leave fresh concrete exposed to a cold snap. For repairs that involve joint sealing, we also need a dry joint. Sealant does not bond well to damp concrete or dusty joint walls.
What to watch through winter is movement at the same spot. If a crack keeps widening, or if a panel edge keeps lifting, that points to ongoing moisture or roots still pushing. Mark the ends of a crack with a pencil line and date it. If it grows over 30 days, do not ignore it.
If you are in Albuquerque, NM and you are seeing heave near landscaping, this is the window to correct the water path before winter does its part.
Key Takeaways
- Vertical displacement (a lip at a crack or joint) usually means base movement, not just concrete shrinkage.
- Drip lines and sprinkler overspray can keep one driveway edge wet without leaving a visible puddle.
- Lasting repairs start with over excavation and compacted 3/4 inch minus base in 2 to 4 inch lifts.
- A 1/2 inch isolation joint plus a flexible polyurethane or polyurea seal keeps water from running down beside the slab.
- Mulch and soil built up against the slab edge holds moisture, keep grade below the concrete and pull mulch back a few inches.
Conclusion
A heaved driveway is the slab telling you something under it is changing. Most of the time it is water. Sometimes it is roots following that water. If we only chase the crack with a surface patch, you get the same problem again, usually in the same spot.
What works is boring work done right: shut off the leak, move the emitters, fix the slope, rebuild the base, isolate the edges, then seal the joints so irrigation water cannot keep sneaking down beside the concrete. If you want us to look at it, we will walk the driveway, flag the likely water sources, and lay out a repair plan that fits what your property is doing right now.